Showing posts with label craft. Show all posts

Wednesday, March 27, 2013

7 Easter Egg Ideas

Who loves Easter?  I know I do! Usually its because not only does it mean Summer is just around the corner (thank freakin' Jesus H Christ) but its a day thats filled with candy, nice outfits, family, tons of great food and last but not least; Easter eggs! Even if you don't celebrate the holiday like myself for religious reasons decorating these little morsels can be a real treat.

Almost all of my family pretty much hates hard boiled eggs so we actually don't boil them all (only about half) before decorating, we just...decorate! I find it easier to do designs and such and then afterwords we just crack them open and make some breakfast with them (cool now I want an omelet.) The ones that are boiled can sit for a bit and cool, or if your feeling really fancy you can try to drain an eggshell out after you decorate it so it can last ~a lifetime~. Totally up to you.

So I scoured the internet for some cool ideas and heres what I came up with! A top seven list for you all to try out with the family this holiday. Enjoy!

1.  Tattooed Eggs


I cant believe I never thought to do this. The amount of things you could do with this idea is crazy. These eggs pictured above look so elegant and beautiful with the images chosen, but if you want to get a little more kid friendly why not add some pictures of spiderman or princesses? Or if you have a love of sailor jerry themed items why not add some to the eggs!


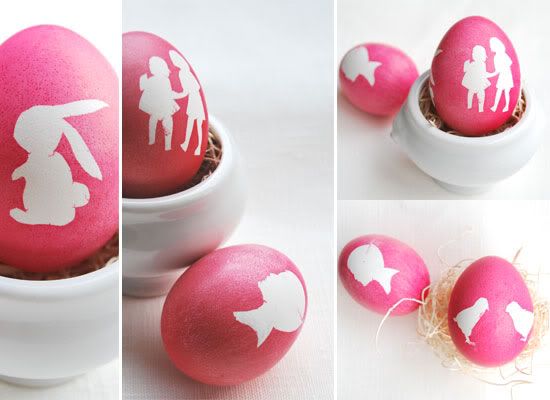
2. Silhouette Eggs

How cute, not too overdone and not too little. You could even do simple shapes like stars and hearts! This is also listed as mid difficulty due to using the exacto blade for cutting out your image, if you find this too difficult grab a pair of scissors and try a smaller image like the ones I mentioned earlier.


3. Easter Egg Terrariums 


I'm sorry but this is freakin' cutest and probably my favorite of all. I am definitely trying this one out for this holiday solely due to the creativity! This is also a great option for a vegan family or someone who just doesn't really like to eat many eggs.


4.  Marbled Eggs
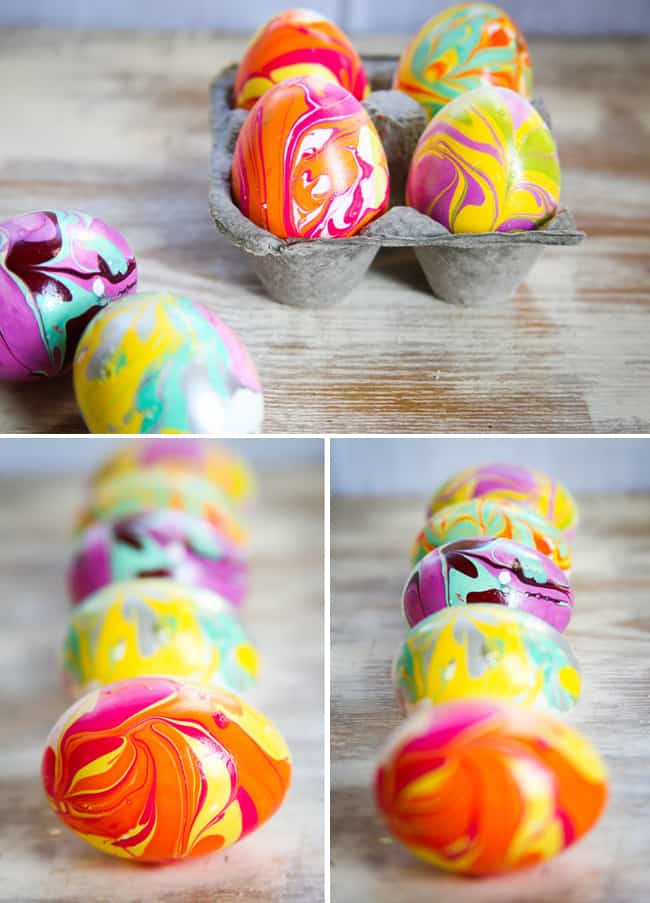

Warning: This is a pretty messy one so make sure you have some nail polish remover ready! This looks so beautiful with the right color scheme. My idea is to try this out with a Wes Anderson themed color pallet like so:


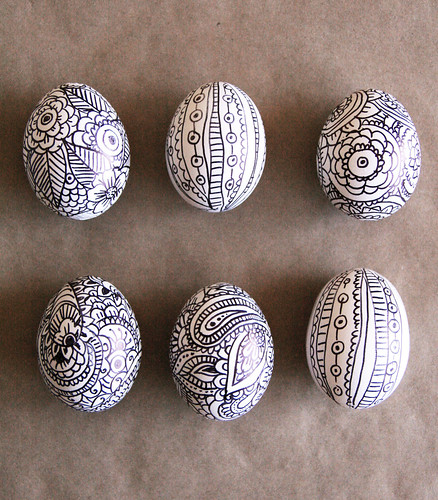
5. Mehndi Style Eggs 


These little munchkins are adorable. I pretty much draw like this on a daily basis so I know how easy it would be for myself, but you can do these designs pretty simply or try to take it up a notch and work on them a little more in depth. All you really need is a sharpie.

6. Speckled (hehe) Eggs 
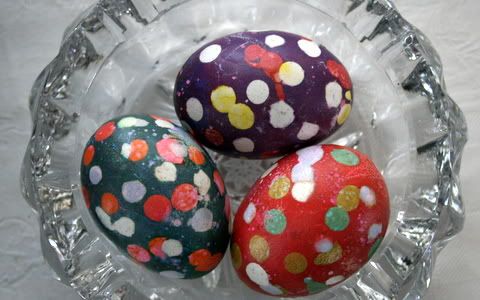


The thing about this project is you have to really pay attention to the last step of letting the wax melt, I could see this whole thing going wrong really fast if you don't keep your eye on that. Otherwise its a pretty cool idea!

7. Fortune Eggs


This idea comes from somewhere foreign in which I could not credit it correctly so I have included the whole tutorial along with it. The one step I don't see explained is the first one which includes puncturing a hole on to both sides of the egg and then blowing into the egg to push the rest of the yolk out. The rest is really design as you wish! How cute, I would love to leave little cute notes for my loved ones.


And thats all! Enjoy the holiday everyone!


All ideas above are not my own personal DIY's but ones chosen from other affiliated sites. All credit can be given to those sites listed in the linked portion of each description. I do not own any of the rights to these images.

Wednesday, March 13, 2013

DIY Wall Art

DIY Wall Art : Hanging Plants


TtiIg_ on Make A Gif, Animated Gifs


So I had a ton of extra eucalyptus from a past project for a friend and wanted to find a nice way to use it. Thus I came across this idea. I love my white walls but felt they looked a little too bare. This really was one of the easiest projects to do. Just turn on some jams and have fun with it!


What You Need:

1. String
2. Any plant you would like (or even flowers!)
3. Scissors
4. Push Pins (not pictured)


STEP ONE

Take your plant and snip it into various lengths, I have high ceilings so I needed some pretty large pieces, but they looked nice mixed with some tiny ones. Do the same with your string. Some of my pieces were about a foot long, while others were about 6".


STEP TWO

Take your string and knot it around the plants end, double knotted! 


And thats it! Once you have the appropriate length for your wall you can use a pin to hang it up and continue on the next one. Just continue these steps until you've got your whole wall covered! 
Ta-da! All it takes is patience and you're good.

Enjoy guys!

Sunday, October 28, 2012

DIY Floral Crown

I had a little bit of a panic attack when trying to find a halloween costume for myself and a few friends
 without having to spend much money. So I put on my best DIY attitude and decided to combine the
 bleach technique from the last DIY post and create some skull shirts. Then added some floral crowns
 for a full Sugar Skull look! I'm mostly just exited that in total this all cost $40 for 3 costumes, and I
 now have a floral crown that I will most likely be wearing at some point again, knowing myself. 


Down to the good stuff, I will be adding some stuff to an Etsy store soon enough, let me know
if there is anything you'd like to see.


DIY Floral Crown


Wednesday, October 24, 2012

DIY BLEACH TANK

First off my apologies for the delay of posts, I've been super duper busy and trying to find time for posts but its much harder than it looks! Anywho, I found time the other day to create a sweet and quick DIY halloween costume of a skeleton. Figure why not continue and use it for a post!

All of the shirts pictured are available for sale at $15 each!
Email me at:
thebloomingcosmos@gmail.com
or leave a comment below with an email to reach you

DIY : BLEACH TANKS

Friday, October 19, 2012

Chalkboard Inspiration

I have a huge huge HUGE love of chalkboard anything really, so as I decide what I would like to chalk up in my home I figured why not seize the opportunity to collect my thoughts and show it to all of you! Here are a few chalkboard inspiration photos that I hope will inspire you on your next DIY endeavor. Or they will inspire your computer to somehow steal your credit card and somehow buy one of these great items, (I know it wasn't you, the computer stole it. It's happened to me too.)


Saturday, October 13, 2012

DIY: Mason Jar Lights


Around this time last year I was helping a friend with some holiday goodies. They had to create a DIY gift for a bunch of friends and make several of them. Naturally I jumped at the chance to help out with a craft, especially one of multiple magnitude that would include mason jars. Not too sure what make these little guys so cute, maybe its the fact that they are glass and pint sized (lets not get into my glass bottle obsession just yet) but they are amazing for crafting.
Nevertheless, this was the end result. So I hope you'll enjoy this quick DIY for the holiday. Make them for Halloween! Use orange sparkles to be a little more fall-ish.  Whatever your little heart desires!


Sunday, October 7, 2012

Halloweenie Part 2!

WHAT ARE YOU BEING FOR HALLOWEEN THIS YEAR?

Apparently my post from last week was super popular with all you ladies and fellas so here is round two! Some are requests and some are just ideas that I have come up with. My main concern with costumes via halloween is that the main parts of it are re-usable for future fabulous attire and that the accessories are your splurge-eqsue halloween items. I mean come on, it is halloween after all and I know I do love a good zombie makeup fiasco or an excuse to buy a lightsaber because "It's for my halloween outfit I swear." or no excuses are really necessary. So grab your best garb and get your makeup brushes ready because Halloween is just around the corner!


Thursday, September 27, 2012

DIY: Painted Buffalo Skull

Happy Thursday everybody! So let me start off by saying that I am incredibly stoked to show you all this little DIY! I was out for a day of thrifting with a friend when we stumbled upon this little gem. He was a little banged up but nothing a little TLC couldn't fix! So we picked him up, brought him home and thus this is where his new life begins, and I mean how could I NOT buy this gem for only $18! So here we go, if you find yourself lucky enough as I to stumble upon a cute little skull gem (yes skulls are cute I swear) than please feel free to follow in my steps and send me your very own photos of painted skeletons! Right in time for Halloween! (hah!)

DIY PAINTED BUFFALO SKULL